
One of these things is not like the other. I feel no shame about #4 having nothing at all to do with beauty. I admit I have an addiction, and I will share my addiction with you because I love you.
Baby oil
This is probably something everyone has been doing forever, and I just caught on to it, but omg baby oil! I'm the queen of razor burn, and I've decided to Knight baby oil for the best after-shave everrrr.
P.S. You can get it at the dollar store in either the liquid or the gel.
(I've also begun using diluted tea tree oil to shrink my pores after shaving, but this I cannot recommend for everyone. If you try it, be sure you're buying 100% therapeutic grade oil.)
Venus Spa Breeze razor cartridges
I am poor. Whenever I go down the razor isle, I have panic attacks. I simply cannot afford good razors. At some stores they want $22 for a package of 4! Are they kidding me? I've been known to use the same razor head for six months in order to save money.
But remember how I'm the Queen of Razor Burn? The only relief I've found is in a GOOD razor. This I discovered when I decided to splurge on some Venus Spa Breeze razor cartridges. Pretty sure they were about $15.99. I had so much guilt about buying them!
My legs thanked me for WEEKS. Those pink pads of lotion are so awesome I didn't even need to use shaving cream with it, and when the lotion parts run out, the razor is still good for a while. For the first time ever I didn't get razor burn after shaving. You're welcome.
Ulta glitter nail polish
I have three boys. I NEVER have time to let my nails dry. I can't remember having perfect polish since my teenage years.
This is my new favorite polish, because it's super pretty, way glittery (yay shimmer!), and it takes about 5 minutes start to finish to throw some on my toes and leave the house. Several times I have been asked "Are those glitter toes?" and people are always surprised when I tell them no.
(About $4 at Ulta.)
Starbucks syrup
Did you guys know you can buy Starbucks (crack) Syrup by the BOTTLE? Yeah, I didn't either, until Boyfriend surprised me with my very own bottle of Cinnamon Dolce syrup, and I fell madly in love with him. (I admit, that wasn't the reason I fell in love. BUT it was definitely one of them.)

$12.95 (which he gave me on a Starbucks gift card, because sharing coffee means love). I had Cinnamon Dolce coffee at home for probably 2 months straight. It lasts forever. If you consider that ever Starbucks is approximately $5, I feel like I robbed them blind. Yum.
P.S. This is definitely not a health tip. You will consume calories and sugar and stuff.
French Tip Guide Stickers
I'll just tell you the truth, I have only had time to use these once, because you have to let your first coat of polish dry COMPLETELY before using them.
But they are so awesome, I've gotta tell you about them. I've seen all sorts of tips on Pinterest about using tape or those little round stickers you put in your binder paper... but I've tried them and those tips didn't work for me. None of them stuck well enough to make a good line. These tip stickers stick really well, and they're so wide you can even cut them in half and use half as many on your smaller toes/fingers. Pretty sure I paid about $2 for them at Sally Beauty Supply.
Bonus: Another awesome tip comes from my friend Carri, who showed us at the Girls' Day party how to remove nail polish with used dryer sheets (and polish remover). That was a cool trick - the polish came off so fast! You should definitely try it.
Baby oil
This is probably something everyone has been doing forever, and I just caught on to it, but omg baby oil! I'm the queen of razor burn, and I've decided to Knight baby oil for the best after-shave everrrr.
P.S. You can get it at the dollar store in either the liquid or the gel.
(I've also begun using diluted tea tree oil to shrink my pores after shaving, but this I cannot recommend for everyone. If you try it, be sure you're buying 100% therapeutic grade oil.)
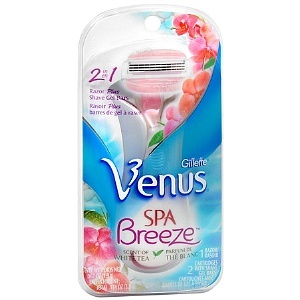
Venus Spa Breeze razor cartridges
 |
| Image credit |
But remember how I'm the Queen of Razor Burn? The only relief I've found is in a GOOD razor. This I discovered when I decided to splurge on some Venus Spa Breeze razor cartridges. Pretty sure they were about $15.99. I had so much guilt about buying them!
My legs thanked me for WEEKS. Those pink pads of lotion are so awesome I didn't even need to use shaving cream with it, and when the lotion parts run out, the razor is still good for a while. For the first time ever I didn't get razor burn after shaving. You're welcome.
Ulta glitter nail polish
 |
| Image Credit |
This is my new favorite polish, because it's super pretty, way glittery (yay shimmer!), and it takes about 5 minutes start to finish to throw some on my toes and leave the house. Several times I have been asked "Are those glitter toes?" and people are always surprised when I tell them no.
(About $4 at Ulta.)
Starbucks syrup
Did you guys know you can buy Starbucks (crack) Syrup by the BOTTLE? Yeah, I didn't either, until Boyfriend surprised me with my very own bottle of Cinnamon Dolce syrup, and I fell madly in love with him. (I admit, that wasn't the reason I fell in love. BUT it was definitely one of them.)
$12.95 (which he gave me on a Starbucks gift card, because sharing coffee means love). I had Cinnamon Dolce coffee at home for probably 2 months straight. It lasts forever. If you consider that ever Starbucks is approximately $5, I feel like I robbed them blind. Yum.
P.S. This is definitely not a health tip. You will consume calories and sugar and stuff.
French Tip Guide Stickers
I'll just tell you the truth, I have only had time to use these once, because you have to let your first coat of polish dry COMPLETELY before using them.
But they are so awesome, I've gotta tell you about them. I've seen all sorts of tips on Pinterest about using tape or those little round stickers you put in your binder paper... but I've tried them and those tips didn't work for me. None of them stuck well enough to make a good line. These tip stickers stick really well, and they're so wide you can even cut them in half and use half as many on your smaller toes/fingers. Pretty sure I paid about $2 for them at Sally Beauty Supply.
Bonus: Another awesome tip comes from my friend Carri, who showed us at the Girls' Day party how to remove nail polish with used dryer sheets (and polish remover). That was a cool trick - the polish came off so fast! You should definitely try it.


.jpg)


